

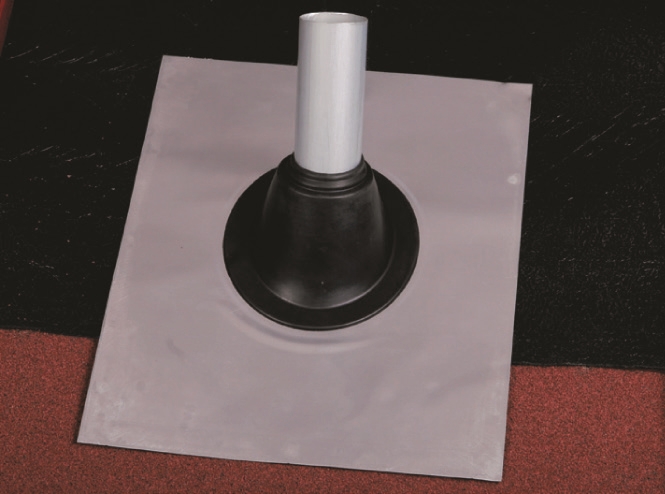
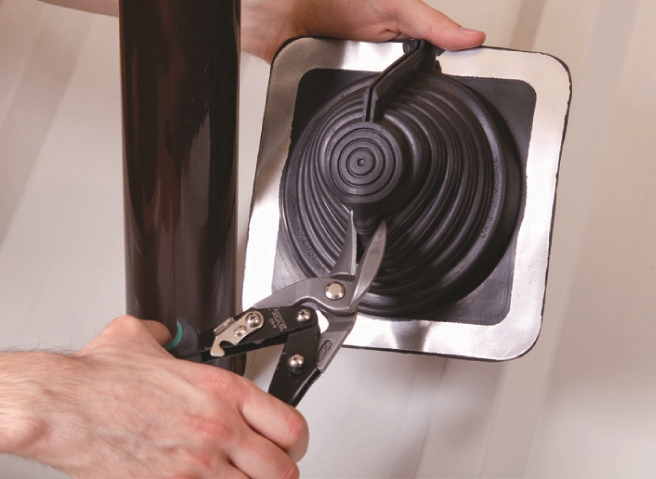
1
Select an appropriate Master Flash® Standard with a pipe range that goes below and beyond fitting. if necessary, use the lines clearly shown on the flashing to trim an opening 20% – 30% smaller than pipe diameter.

2
Slide the Master Flash® down the pipe, using a non-petroleum-based lubricant to ease installation.

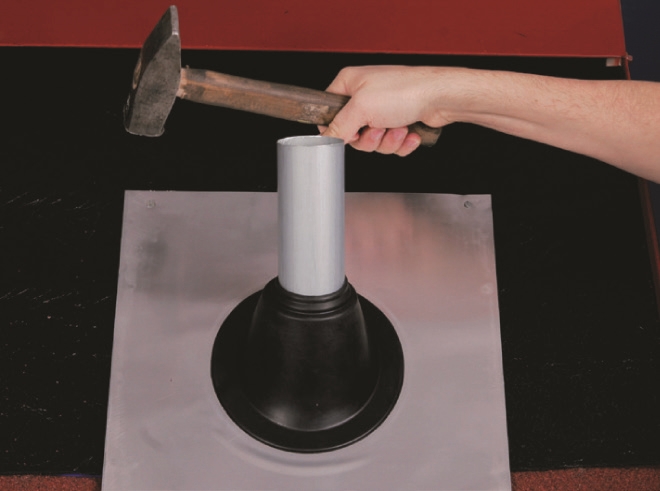
3
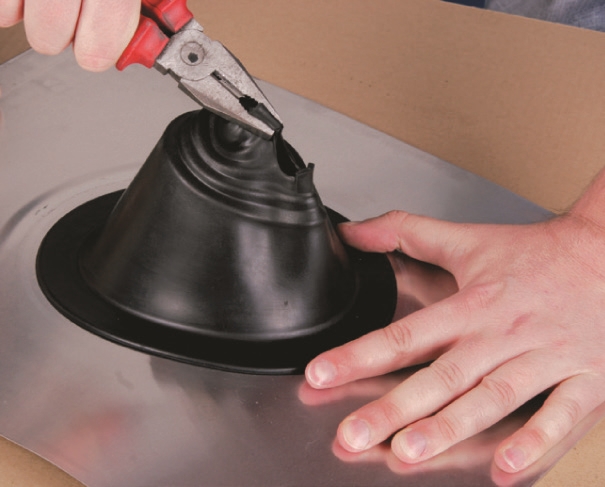
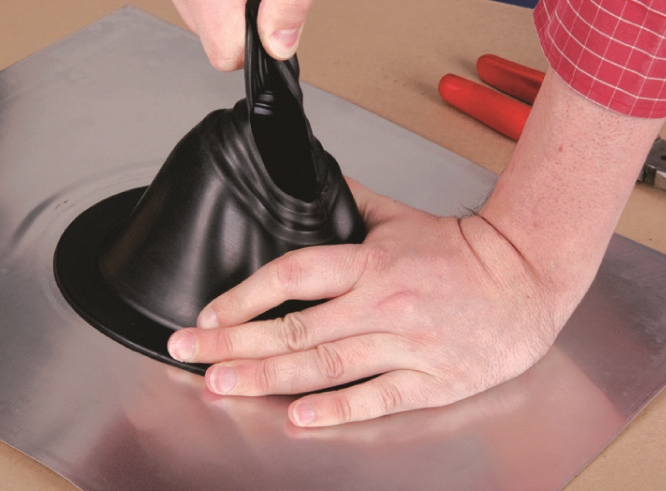
Press Master Flash® down, bending it to conform to roof profile or roof irregularities. A blunt tool will help to form flashing to tight roof angles.

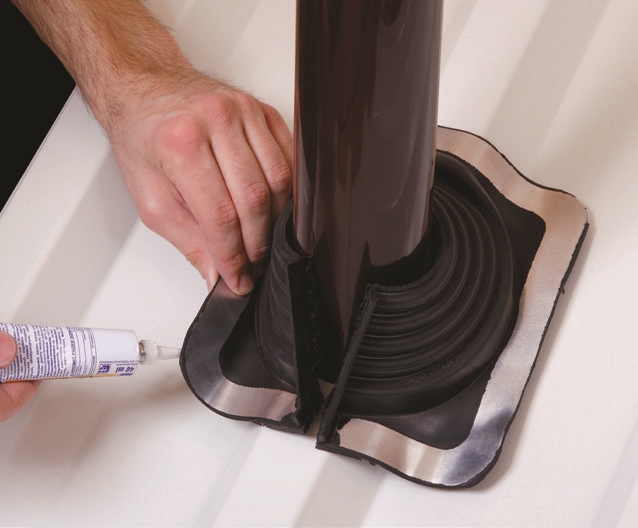
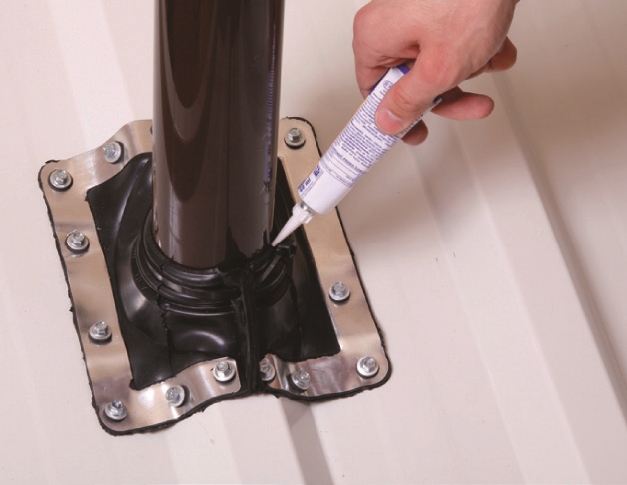
4
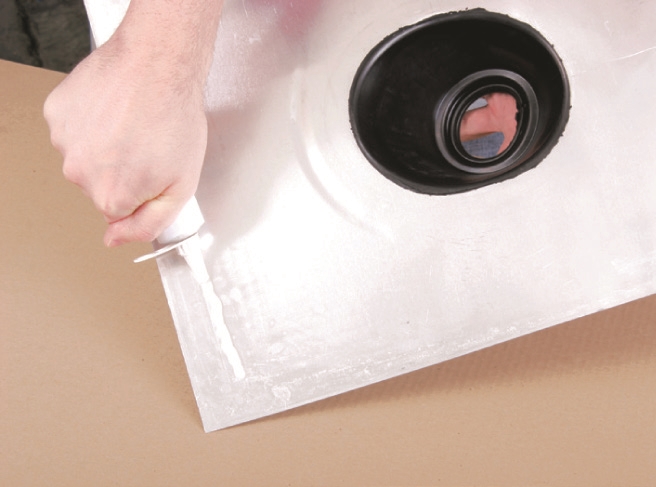
Apply sealant between the base of the flashing and the roof.
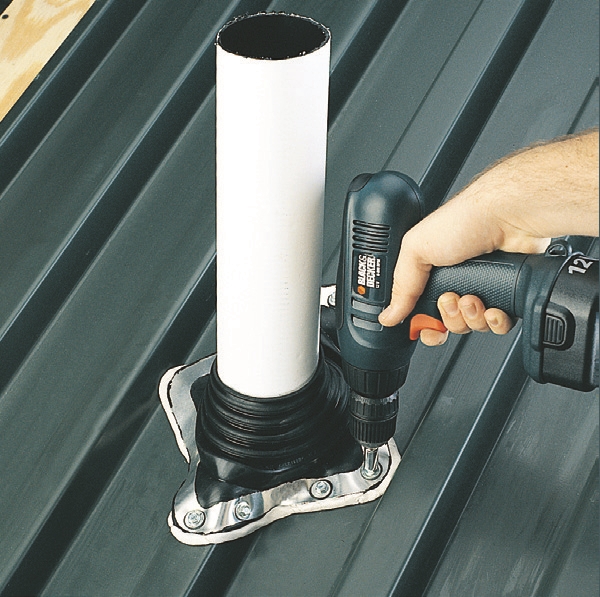
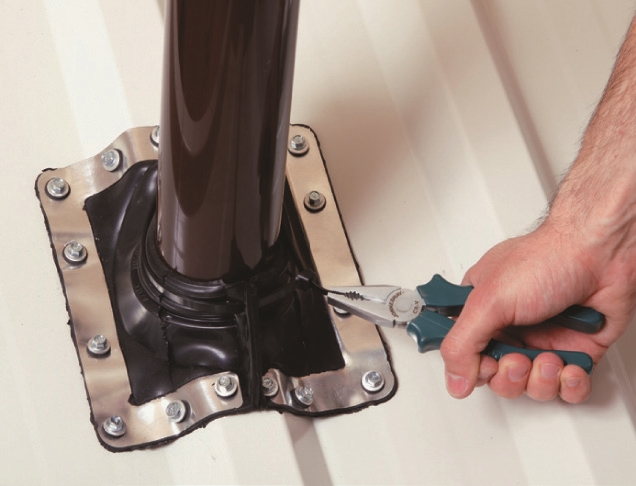
5
Use fasteners to complete sealing. For a secure installation, fastener spacing must not exceed 1.5” (38 mm).
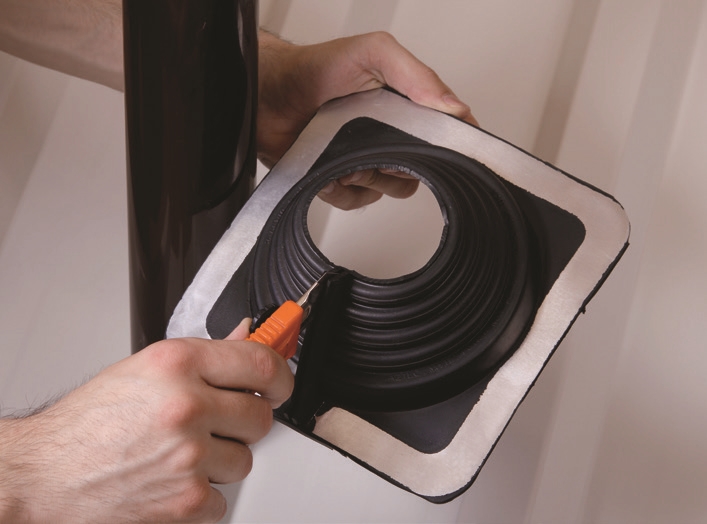
1
Select an appropriate Master Flash® Residential with a pipe range that goes below and beyond fitting. If necessary, follow the lines clearly shown on the flashing and use pliers to pull the tab to create an opening 20-30% smaller than pipe diameter.
2
3

4
Slide the Master Flash® Residential down the pipe, using a non-petroleum-based lubricant to ease installation.
5
6
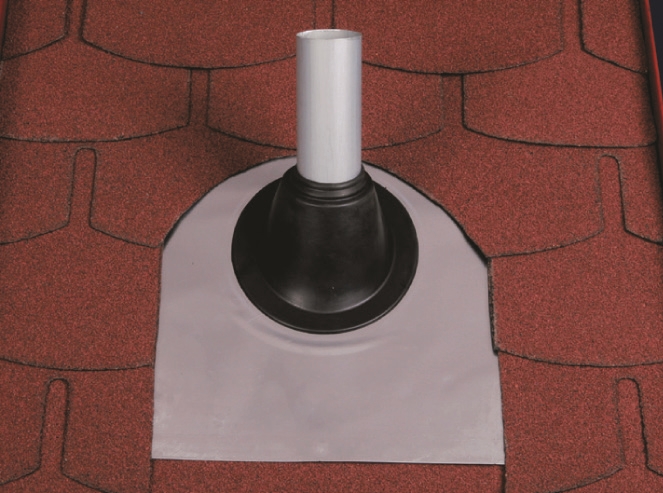
7
Install tiles at the sides of the Master Flash® Residential
8
1
Select an appropriate Master Flash® Multi-Flash with a pipe range that goes below and beyond fitting. If necessary, follow the lines clearly shown on the flashing and create an opening 20-30% smaller than pipe diameter.
2
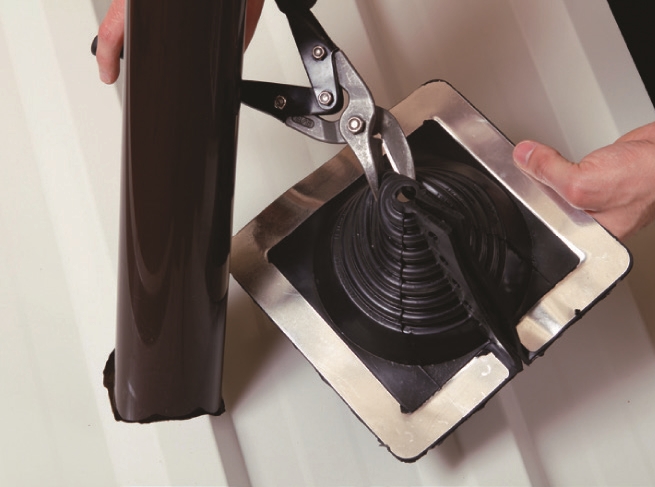
If using this product as a Retrofit, cut down the side in the clearly-marked flange.
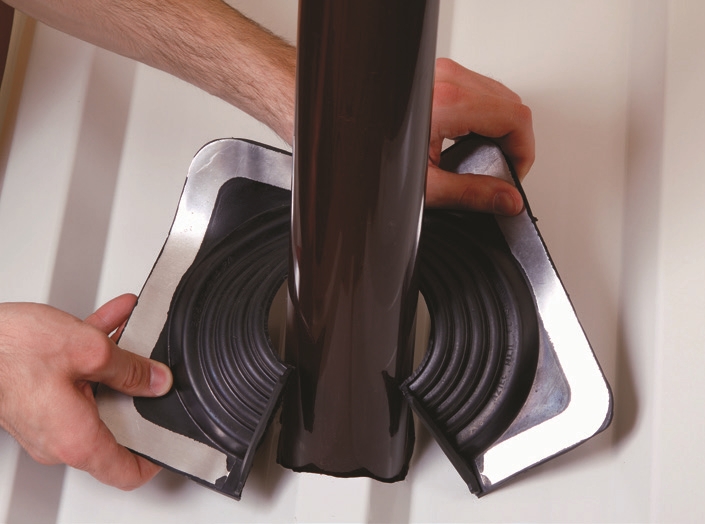
3
Slide the Master Flash® Multi-Flash down the pipe, using a non-petroleum-based lubricant to ease installation. For Retrofit applications, wrap the product around the pipe.

4
Press Master Flash® Multi-Flash down, bending it to conform to roof profile or irregularities. A blunt tool will help to form flashing to tight roof angles.
5
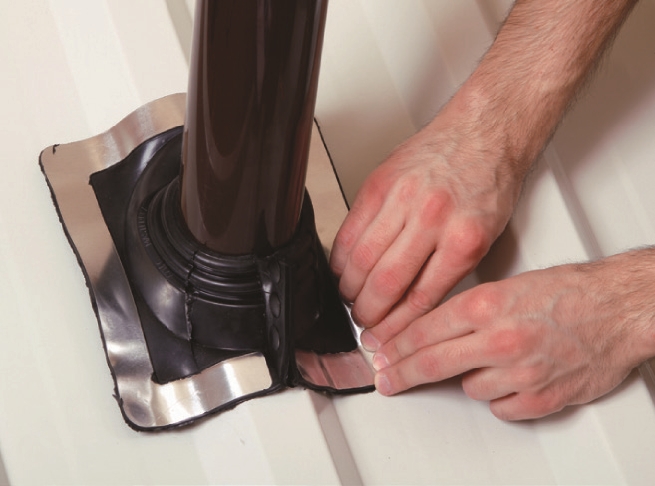
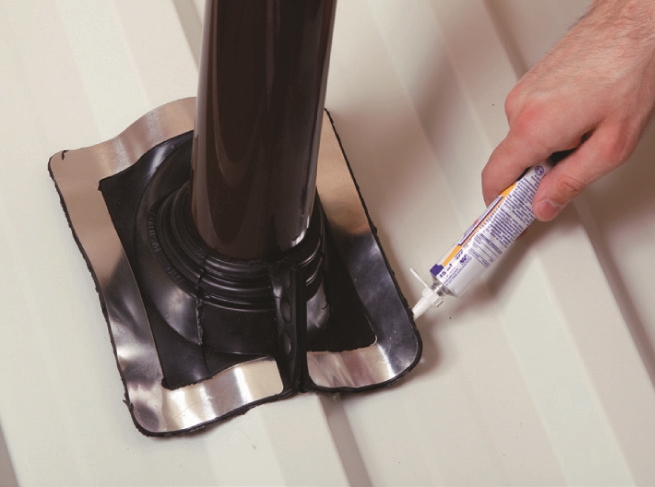
Apply sealant between the base of the flashing and the roof, as well as at the top of the flange.

6
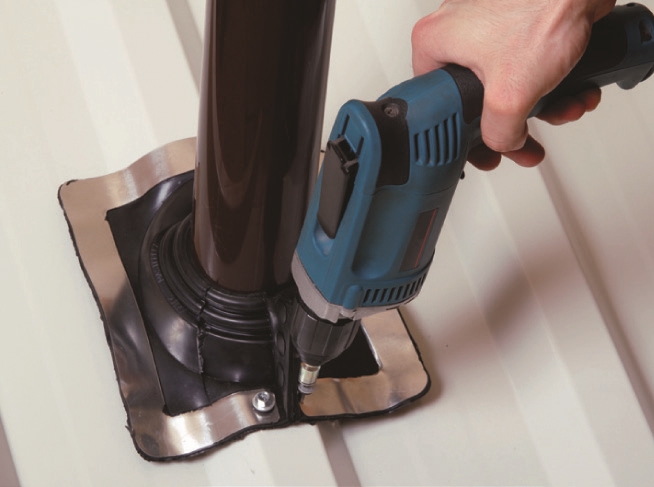
Place the stainless steel gripper on the flange to close and secure the Master Flash® Multi-Flash.
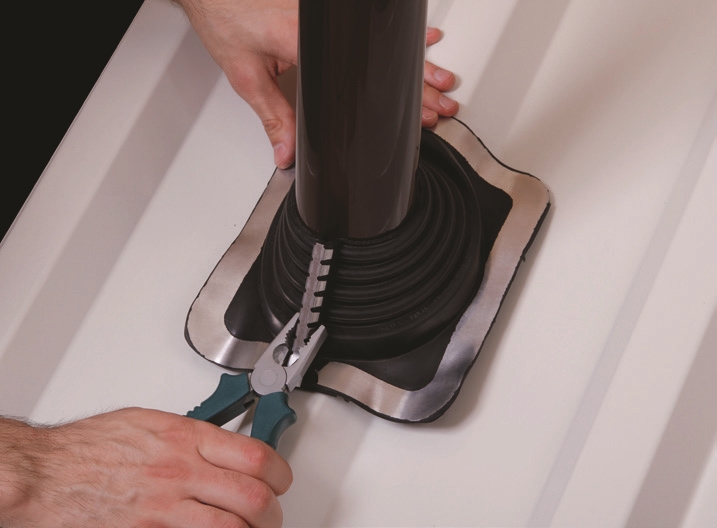
7
Tighten the stainless steel gripper.

8
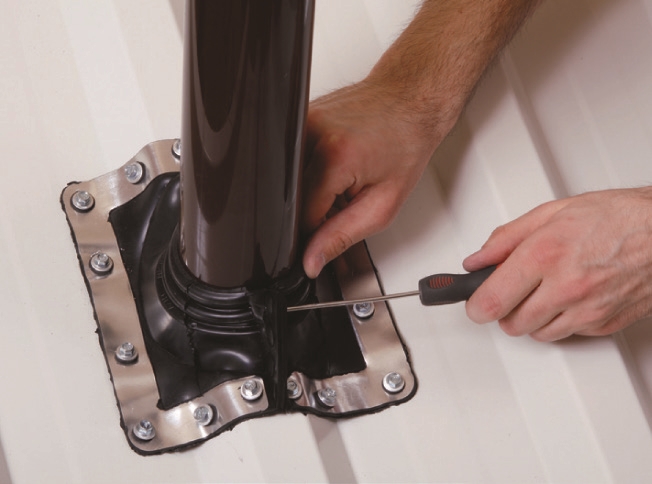
Use fasteners to complete sealing. For a secure installation, fastener spacing must not exceed 1.5” (38 mm).

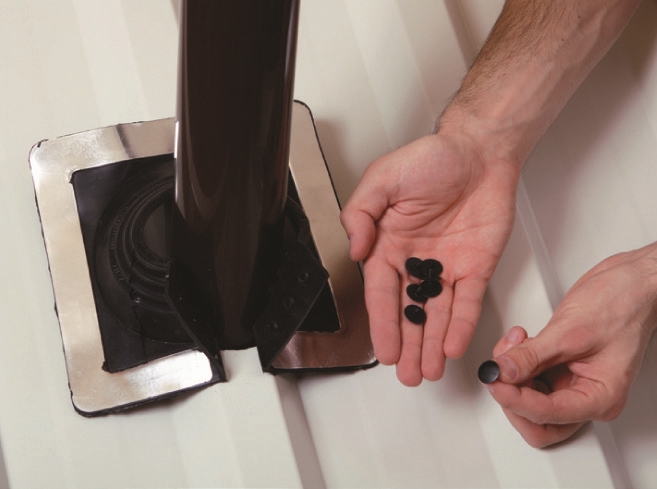
9
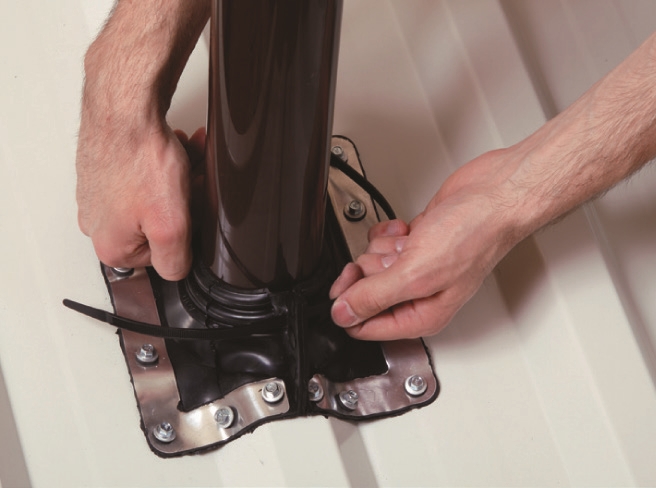
Additional sealant may be applied between the flashing and the pipe. Apply as needed.
1
Select an appropriate Master Flash® Retrofit with a pipe range that goes below and beyond fitting. If necessary, follow the lines clearly shown on the flashing and create an opening 10-20% smaller than pipe diameter. Slice down the flange.
2
Wrap Master Flash® Retrofit around the pipe and install all snap rivets to seal the flange.
3
Press Master Flash® Retrofit down, bending it to conform to roof profile or irregularities. A blunt tool will help to form flashing to tight roof angles.
4
Apply sealant between the base roof and at the top of the flange.
5
Use fasteners to complete sealing. For installation, fastener spacing may not exceed 1.5” (38 mm).
6
Make a hole in the flange to insert a cable tie or steel band depending on product material.
7
Slide the cable tie through the hole, ensuring that it is resting on the flashing.
8
Put the cable or band as tight as it will go.
9
Additional sealant can be applied between the flashing and the pipe.